I. Introduction
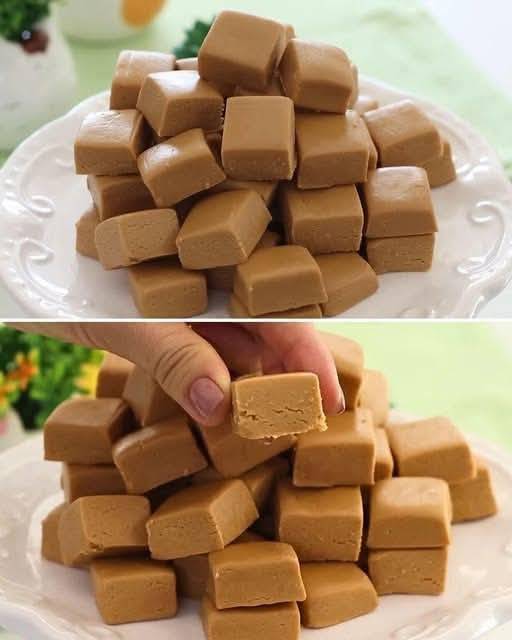
Sweet milk fudge squares are a classic treat loved by people of all ages. Their rich, creamy texture and melt-in-your-mouth sweetness make them an irresistible dessert or snack. Whether enjoyed with a cup of tea, coffee, or on their own, these squares offer a perfect blend of simplicity and indulgence.
Making sweet milk fudge at home is surprisingly easy and requires only a few basic ingredients. This article will guide you through a step-by-step process, from selecting ingredients to perfecting the texture. Additionally, we’ll explore variations and tips to enhance the flavor and ensure the best results. If you’ve never tried making fudge before, this guide will help you create a delicious batch with confidence.
II. Ingredients
See more similar products here: amzn.to/4iwF8MP
One of the best things about sweet milk fudge squares is their simplicity. Here’s what you’ll need:
- 2 cups sweetened condensed milk – The key ingredient that gives the fudge its smooth and creamy texture.
- 1/2 cup butter – Adds richness and enhances the melt-in-your-mouth quality.
- 2 cups granulated sugar – Provides sweetness and helps with the fudge’s structure.
- 1/2 cup whole milk – Helps dissolve the sugar and gives the fudge a smooth consistency.
- 1 teaspoon vanilla extract – Adds a depth of flavor and enhances the overall taste.
- Optional add-ins: Chopped nuts (walnuts, almonds, or pecans), chocolate chips, caramel drizzle, or a pinch of sea salt for a gourmet touch.
III. Equipment Needed
Before you begin, gather the necessary equipment to ensure a smooth cooking process:
- Heavy-bottomed saucepan – Prevents scorching and ensures even heating.
- Wooden spoon or spatula – Helps stir the mixture efficiently.
- Baking dish (8×8-inch or similar) – Used for setting the fudge.
- Parchment paper – Makes it easy to remove the fudge from the dish.
- Sharp knife – For cutting the fudge into squares once it sets.
IV. Step-by-Step Instructions
1. Preparing the Mixture
- Line your baking dish with parchment paper, ensuring that there is enough overhang for easy removal.
- In a heavy-bottomed saucepan, combine the sweetened condensed milk, butter, sugar, and whole milk.
- Place the saucepan over medium heat and stir continuously to prevent burning.
- Bring the mixture to a gentle boil while stirring constantly.
- Reduce the heat slightly and continue stirring for about 10-15 minutes, or until the mixture thickens and reaches the soft-ball stage (approximately 235°F/112°C on a candy thermometer).
2. Adding Flavor & Setting
- Remove the saucepan from heat and stir in the vanilla extract.
- If adding nuts or chocolate chips, fold them into the mixture at this stage.
- Pour the fudge mixture into the prepared baking dish, spreading it evenly.
- Let it cool at room temperature for about 1-2 hours.
- For a firmer texture, refrigerate the fudge for an additional 30-60 minutes.
3. Cutting into Squares
- Once fully set, lift the fudge out of the dish using the parchment paper.
- Place it on a clean cutting board and use a sharp knife to cut it into bite-sized squares.
- For cleaner cuts, lightly grease the knife or dip it in warm water before slicing.
V. Serving Suggestions
Sweet milk fudge squares can be served in various ways to enhance their appeal:
- Enjoy them as a standalone dessert or snack.
- Pair them with hot beverages like coffee, tea, or hot chocolate.
- Wrap individual squares in wax paper and give them as homemade gifts.
- Serve with a scoop of vanilla ice cream for a richer experience.
VI. Variations & Tips
Variations:
- Chocolate Fudge: Add 1/2 cup cocoa powder or 1 cup melted chocolate to the mixture before pouring it into the dish.
- Nutty Fudge: Fold in 1/2 cup of chopped nuts for added crunch.
- Caramel Swirl Fudge: Drizzle caramel sauce over the top before setting.
- Salted Fudge: Sprinkle a pinch of sea salt on top for a sweet-salty contrast.
Tips for Perfect Fudge:
- Use a candy thermometer – Ensuring the correct temperature (235°F/112°C) prevents the fudge from being too soft or too hard.
- Avoid overcooking – Overheating the mixture can result in a grainy texture.
- Stir continuously – This prevents burning and ensures even cooking.
- Allow proper cooling – Let the fudge set completely before cutting for clean, well-formed squares.
- Store correctly – Keep in an airtight container at room temperature for up to a week or refrigerate for longer shelf life.
VII. Conclusion
Sweet milk fudge squares are a delightful and easy-to-make treat that brings joy to any occasion. With just a few ingredients and simple steps, you can create a homemade confection that rivals any store-bought fudge. The versatility of this recipe allows for endless variations, making it perfect for experimenting with different flavors and textures.
Whether you prefer classic creamy fudge, chocolate-infused versions, or nutty and caramel-rich alternatives, this recipe provides a solid foundation for endless possibilities. Try making a batch today and enjoy the rich, buttery goodness of homemade sweet milk fudge squares!