Introduction
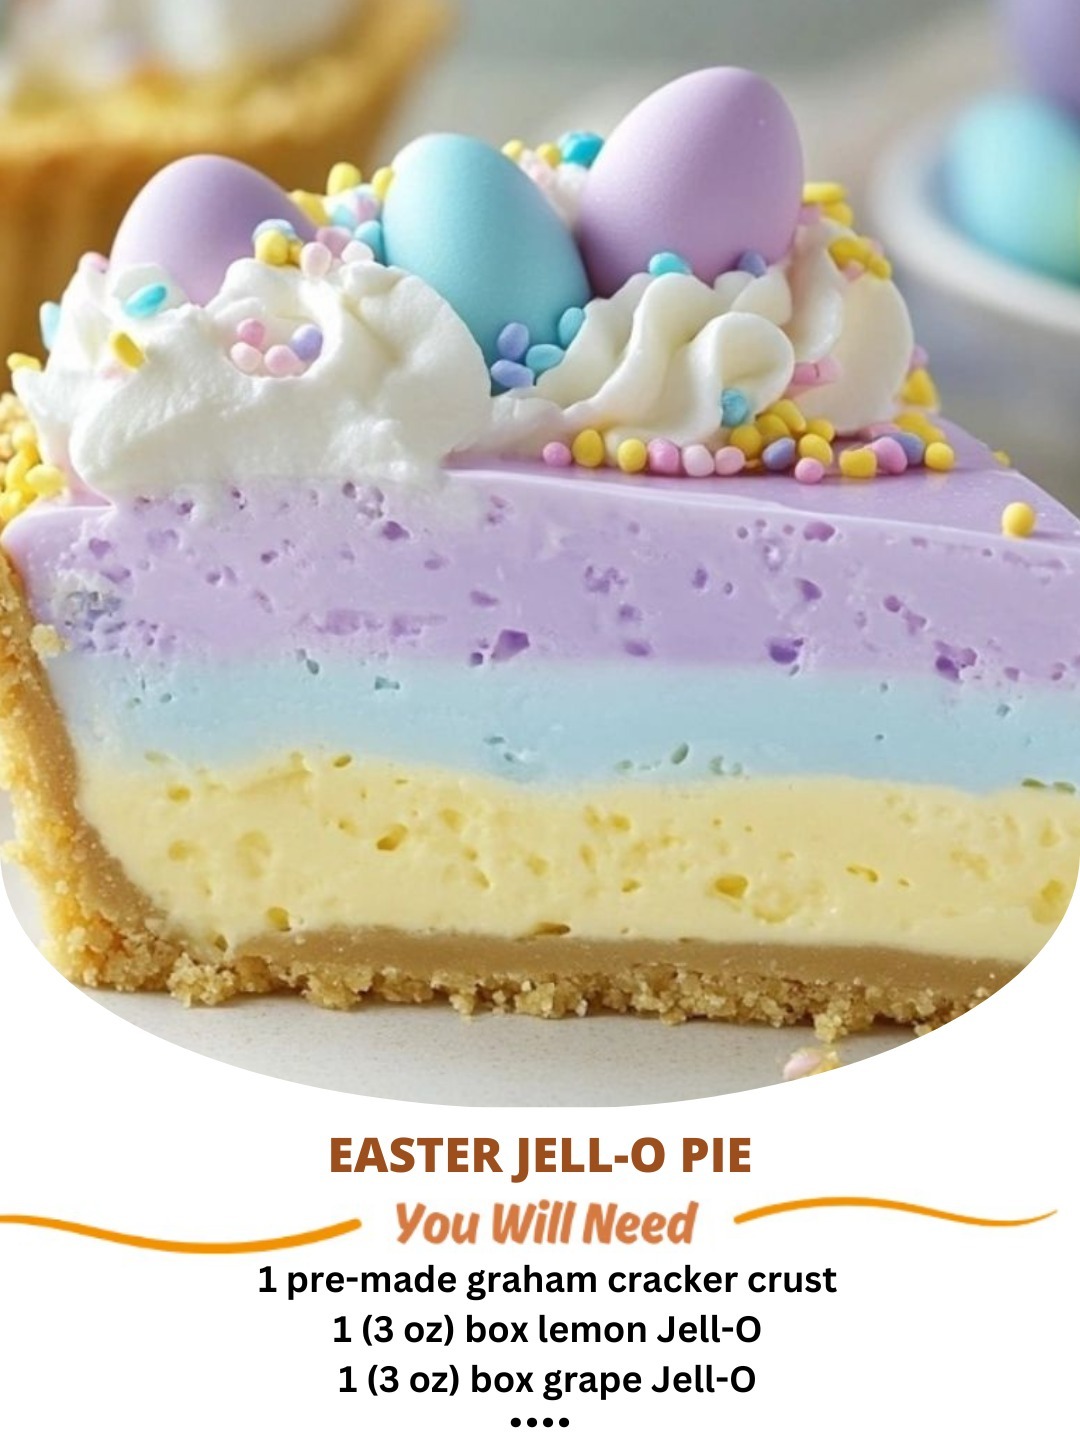
Easter is a time for celebration, family gatherings, and of course, delicious treats. If you’re looking for a festive and colorful dessert that’s easy to make, look no further than Easter Jell-O Pie. This no-bake dessert is light, creamy, and bursting with bright pastel colors that perfectly match the holiday spirit. Made with a simple graham cracker crust, flavored Jell-O, and whipped topping, this pie is a guaranteed hit for kids and adults alike.
Whether you’re hosting an Easter brunch, bringing a dish to a family gathering, or just looking for a fun way to enjoy Jell-O, this recipe is sure to impress. Let’s dive into the steps to create this beautiful and tasty Easter dessert.
Ingredients
For the Crust:
- 1 ½ cups graham cracker crumbs
- ¼ cup granulated sugar
- 6 tablespoons unsalted butter, melted
For the Filling:
- 3 different flavors of Jell-O (such as strawberry, lemon, and berry blue for vibrant colors)
- 1 cup boiling water per Jell-O flavor
- ½ cup cold water per Jell-O flavor
- 1 tub (8 oz) whipped topping (Cool Whip), thawed
- ½ cup cream cheese, softened (optional for extra creaminess)
For Garnish (Optional):
- Whipped cream
- Easter-themed sprinkles
- Mini marshmallows or pastel-colored candy eggs
- Shredded coconut (can be dyed green for a “grass” effect)
Step-by-Step Instructions
1. Prepare the Crust
A sturdy graham cracker crust provides the perfect base for this pie.
- In a medium bowl, mix the graham cracker crumbs and sugar.
- Add the melted butter and stir until the mixture resembles wet sand.
- Press the mixture firmly into the bottom and sides of a 9-inch pie pan.
- Chill in the refrigerator for at least 30 minutes to set.
2. Make the Jell-O Layers
To achieve a colorful layered effect, each Jell-O flavor is prepared separately.
- Dissolve one packet of Jell-O in 1 cup of boiling water, stirring until completely dissolved.
- Add ½ cup of cold water and stir.
- Allow the Jell-O to cool to room temperature, but do not let it set.
- In a separate bowl, gently fold in ⅓ of the whipped topping until well combined.
- Pour the mixture into the pie crust and refrigerate for about 30-40 minutes, or until set but not firm.
- Repeat the process with the remaining Jell-O flavors, layering each one carefully over the previous layer and refrigerating between each addition.
3. Final Chill and Garnish
- Once all layers are set, refrigerate the pie for at least 4 hours (or overnight for best results).
- Before serving, decorate with whipped cream, Easter sprinkles, mini marshmallows, or pastel-colored candies for an extra festive touch.
Serving and Storage Tips
How to Serve:
- Slice and serve chilled for a refreshing treat.
- Pair with a scoop of vanilla ice cream or a drizzle of sweetened condensed milk for added indulgence.
How to Store:
- Store the pie in the refrigerator, covered with plastic wrap or foil, for up to 3 days.
- Avoid freezing, as Jell-O does not retain its texture well when frozen.
Variations and Customizations
1. Different Crust Options:
- Use a store-bought graham cracker crust to save time.
- Swap graham crackers for crushed vanilla wafers or shortbread cookies for a unique twist.
- Try an Oreo cookie crust for a chocolatey contrast.
2. Alternative Jell-O Flavors:
- Use flavors that match your Easter theme, such as lime, cherry, and orange.
- For a tropical version, try mango, pineapple, and coconut Jell-O.
3. Dairy-Free and Healthier Options:
- Substitute dairy-free whipped topping for a lactose-free version.
- Use sugar-free Jell-O for a lower-calorie dessert.
Conclusion
Easter Jell-O Pie is the perfect way to bring color, fun, and sweetness to your holiday table. This easy-to-make, no-bake dessert is great for all ages and can be customized in endless ways to suit your tastes. With its vibrant layers and creamy texture, it’s sure to be a show-stopper at any Easter gathering.
So, gather your ingredients, get creative with your colors, and enjoy making (and eating) this delightful Easter treat! Happy Easter and happy baking!