Introduction
Imagine biting into a cloud – a light, fluffy, and slightly tangy biscuit that melts in your mouth. That’s the magic of homemade angel biscuits! Forget store-bought alternatives; these are simpler to make than you think, and the taste difference is phenomenal. This guide will walk you through a tried-and-true angel biscuit recipe, complete with tips and tricks for achieving biscuit perfection every time.
Making Angel Biscuits: A Step-by-Step Guide
What are Angel Biscuits?
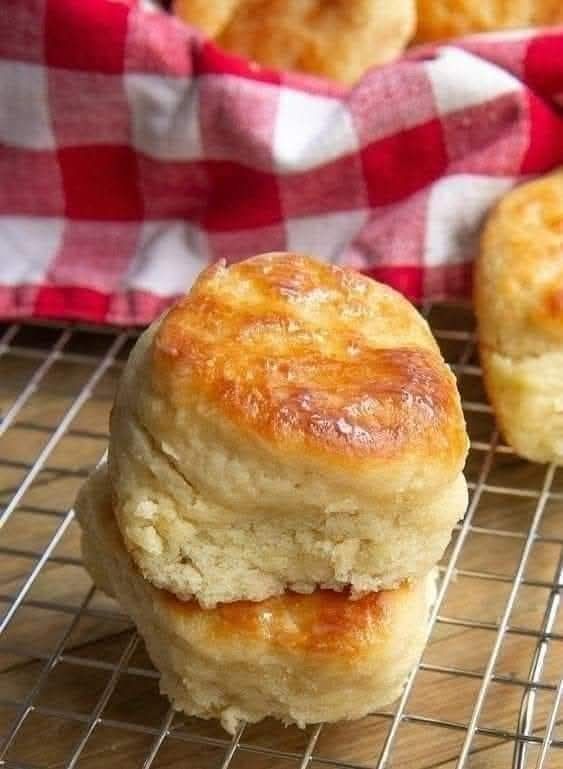
Angel biscuits are a unique type of biscuit that combines the leavening power of baking powder with the rich flavor and tenderness of yeast. This combination creates a biscuit that’s lighter and fluffier than a traditional baking powder biscuit, yet has a slightly more complex flavor profile. They’re the perfect accompaniment to breakfast, lunch, or dinner.
Ingredients You’ll Need
Here’s what you’ll need to whip up a batch of these heavenly biscuits:
- 4 cups all-purpose flour, plus more for dusting
- 1 tablespoon baking powder
- 1 teaspoon baking soda
- 1 teaspoon salt
- 2 tablespoons granulated sugar
- 1/4 cup vegetable shortening or lard, chilled
- 1 package (1/4 ounce) active dry yeast
- 1/4 cup warm water (105-115°F)
- 1 1/2 cups buttermilk, chilled
- 2 tablespoons melted butter, for brushing (optional)
Step-by-Step Instructions
- Activate the Yeast: In a small bowl, dissolve the yeast in warm water. Let stand for 5-10 minutes, or until foamy. This indicates the yeast is active.
- Combine Dry Ingredients: In a large bowl, whisk together the flour, baking powder, baking soda, salt, and sugar.
- Cut in the Shortening: Using a pastry blender or your fingertips, cut the chilled shortening into the dry ingredients until the mixture resembles coarse crumbs. This creates pockets of fat that contribute to flakiness.
- Add Wet Ingredients: Add the activated yeast and buttermilk to the flour mixture. Stir until just combined. Do not overmix! A few lumps are okay.
- Knead Lightly: Turn the dough out onto a lightly floured surface. Gently knead 5-6 times, just enough to bring the dough together.
- Roll and Cut: Roll the dough to about 1/2 inch thickness. Use a 2-inch biscuit cutter to cut out biscuits. Try to cut straight down without twisting the cutter, as twisting can seal the edges and prevent rising.
- Arrange on Baking Sheet: Place the biscuits on a baking sheet lined with parchment paper or a silicone baking mat.
- Let Rise: Cover the biscuits loosely with plastic wrap or a clean kitchen towel. Let them rise in a warm place for 30-45 minutes, or until doubled in size.
- Bake: Preheat oven to 400°F (200°C). Bake for 12-15 minutes, or until golden brown.
- Brush with Butter (Optional): Immediately after baking, brush the tops of the biscuits with melted butter for added flavor and shine.
- Serve: Serve warm and enjoy!
Tips for Perfect Angel Biscuits
- Keep Ingredients Cold: Cold ingredients are key for flaky biscuits. Chill the flour, shortening, and buttermilk before starting.
- Don’t Overmix: Overmixing develops gluten, resulting in tough biscuits. Mix until just combined.
- Handle with Care: Be gentle when kneading and cutting the biscuits. Avoid overworking the dough.
- Warm Rising Environment: Place the biscuits in a warm, draft-free place to rise properly. A slightly warmed oven (turned off) works well.
- Check Yeast Activity: Always check that your yeast is active before adding it to the other ingredients. If it doesn’t foam, it’s likely dead and you’ll need to use fresh yeast.
- Adjust Baking Time: Baking times may vary depending on your oven. Keep a close eye on the biscuits and adjust the baking time as needed.
Variations and Serving Suggestions
- Sweet Angel Biscuits: Add an extra tablespoon of sugar and a pinch of cinnamon to the dry ingredients for a sweeter biscuit.
- Savory Angel Biscuits: Add herbs like rosemary or thyme to the dry ingredients for a savory twist.
- Serve with: Honey, jam, butter, gravy, sausage gravy, fried chicken, pulled pork, or alongside your favorite soup or stew.
Conclusion
Homemade angel biscuits are a delightful treat that’s sure to impress. With a little practice and these helpful tips, you’ll be baking up batches of fluffy, flavorful biscuits in no time. So, ditch the store-bought biscuits and experience the joy of making these heavenly creations yourself! They’re perfect for any occasion and are guaranteed to become a family favorite.