Introduction
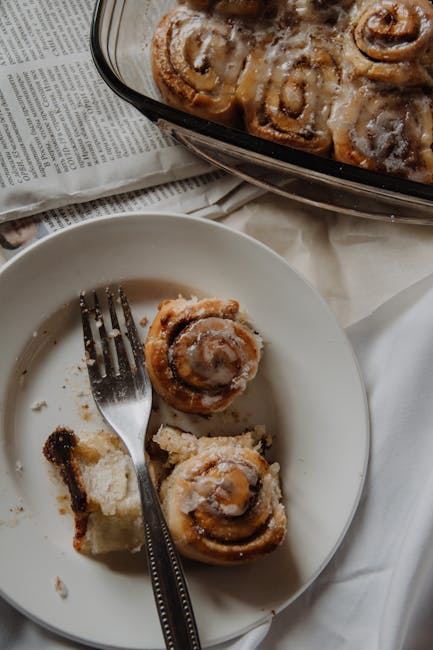
Cinnamon rolls. Just the name conjures images of warm, gooey goodness and the irresistible aroma that fills your kitchen. While they might seem intimidating to bake from scratch, mastering the art of cinnamon rolls is surprisingly achievable. This guide will take you from novice baker to cinnamon roll pro, covering everything from dough preparation to perfecting that delectable cream cheese frosting. Get ready to impress your friends and family with homemade cinnamon rolls that rival even the best bakeries!
Mastering the Dough: The Foundation of Perfect Cinnamon Rolls
Choosing the Right Flour
The type of flour you use significantly impacts the texture of your cinnamon rolls. Bread flour, with its higher protein content, develops more gluten, resulting in a chewier, more structured roll. All-purpose flour works well too, but you might need to adjust the liquid slightly. We recommend starting with:
- Bread flour: For a chewy, bakery-style roll.
- All-purpose flour: A versatile option that still delivers delicious results.
Activating the Yeast: The Key to a Light and Airy Dough
Yeast is the leavening agent that gives cinnamon rolls their characteristic fluffiness. Proper activation is crucial. Follow these steps:
- Warm your milk to around 105-115°F (40-46°C).
- Add the yeast and a teaspoon of sugar to the warm milk.
- Let it sit for 5-10 minutes. The mixture should become foamy, indicating the yeast is active. If it doesn’t foam, your yeast might be old and needs replacing.
Kneading for Success: Developing Gluten
Kneading develops the gluten in the flour, creating a strong and elastic dough. You can knead by hand or using a stand mixer. If kneading by hand:
- Knead on a lightly floured surface for 8-10 minutes, until the dough is smooth and elastic.
- Use the “stretch and fold” technique: Push down with the heel of your hand, rotate the dough, and repeat.
If using a stand mixer:
- Use the dough hook attachment and knead on medium speed for 6-8 minutes, until the dough pulls away from the sides of the bowl.
The First Rise: Letting the Dough Double
After kneading, place the dough in a lightly oiled bowl, turning to coat. Cover with plastic wrap or a clean kitchen towel and let it rise in a warm place for 1-2 hours, or until doubled in size. This allows the yeast to do its work, creating air pockets that make the rolls light and fluffy. A warm environment, such as a slightly warmed oven or a sunny spot, is ideal for this step.
Crafting the Filling: Flavor Explosion!
The Classic Cinnamon-Sugar Mixture
The filling is where the magic truly happens. The classic combination of cinnamon and sugar provides the perfect balance of sweetness and spice. Here’s a simple and delicious filling recipe:
- 1 cup granulated sugar
- 3 tablespoons ground cinnamon
- ½ teaspoon salt (optional, but enhances the flavors)
Mix all ingredients together in a bowl.
Adding Butter: The Key to Gooeyness
Melted butter is essential for binding the cinnamon-sugar mixture and creating that irresistible gooey texture. Use unsalted butter for better control over the salt content of your rolls. Spread the melted butter evenly over the rolled-out dough before sprinkling on the cinnamon-sugar mixture.
Optional Additions: Elevating Your Rolls
Want to take your cinnamon rolls to the next level? Consider adding these flavor boosters:
- Nuts: Chopped pecans, walnuts, or almonds add a delightful crunch.
- Raisins: A classic addition for a touch of sweetness and texture.
- Citrus Zest: Orange or lemon zest adds a bright and refreshing note.
Rolling, Shaping, and Baking: The Final Touches
Rolling Out the Dough: Achieving Uniform Thickness
After the first rise, gently punch down the dough to release the air. Roll it out on a lightly floured surface into a large rectangle, about ¼-inch thick. Aim for a consistent thickness to ensure even baking.
Shaping the Rolls: The Swirl Technique
Sprinkle the cinnamon-sugar mixture evenly over the buttered dough. Starting from one long edge, tightly roll the dough into a log. Use a sharp, serrated knife or unflavored dental floss to cut the log into 1-inch thick slices. Place the rolls in a greased baking pan, leaving a little space between each one.
The Second Rise: Maximizing Fluffiness
Cover the pan with plastic wrap or a clean kitchen towel and let the rolls rise again for 30-45 minutes, or until puffy. This second rise is crucial for achieving maximum fluffiness.
Baking to Golden Perfection
Preheat your oven to 350°F (175°C). Bake the cinnamon rolls for 20-25 minutes, or until golden brown and cooked through. Check for doneness by inserting a toothpick into the center of a roll; it should come out clean.
The Cream Cheese Frosting: The Crowning Glory
The Perfect Ratio: Creamy and Tangy
Cream cheese frosting is the ultimate complement to warm cinnamon rolls. Here’s a classic recipe:
- 8 ounces cream cheese, softened
- ½ cup unsalted butter, softened
- 3-4 cups powdered sugar
- 1-2 teaspoons vanilla extract
- 2-4 tablespoons milk (adjust to desired consistency)
Mixing for Smoothness
In a large bowl, beat the softened cream cheese and butter until smooth and creamy. Gradually add the powdered sugar, beating until well combined. Stir in the vanilla extract and milk, adding more milk as needed to achieve your desired consistency. The frosting should be smooth, creamy, and spreadable.
Frosting Application: The Final Flourish
Let the cinnamon rolls cool slightly before frosting. Generously spread the cream cheese frosting over the warm rolls. The heat will slightly melt the frosting, creating a luscious, irresistible glaze.
Conclusion
Baking cinnamon rolls like a pro is within reach! By following these steps and practicing, you’ll be creating batches of warm, gooey, and utterly irresistible cinnamon rolls in no time. Experiment with different fillings and toppings to personalize your creations and truly make them your own. Enjoy the delicious results of your baking efforts!
