Introduction
Want to transform your cupcakes from ordinary to extraordinary? Mastering cupcake frosting techniques is the key! Whether you’re a seasoned baker or just starting out, learning the art of professional-looking frosting will impress your friends, family, and even yourself. This guide will walk you through essential tools, different frosting types, and step-by-step instructions to create stunning cupcake designs. Get ready to elevate your baking game!
Essential Tools for Frosting Like a Pro
Piping Bags
A piping bag is your best friend when it comes to creating intricate designs. Consider these options:
- Disposable Piping Bags: Convenient for easy cleanup.
- Reusable Piping Bags: Eco-friendly and durable for frequent use.
Piping Tips
Different tips create different effects. Here are a few must-haves:
- Round Tip: Ideal for writing and outlining.
- Star Tip: Creates classic swirls and rosettes.
- Leaf Tip: Perfect for creating realistic leaves.
- Petal Tip: Makes beautiful rose designs.
Offset Spatula
An offset spatula allows for smooth and even frosting application, especially for a simple, elegant look. It helps spread frosting without your hand getting in the way.
Turntable
A turntable provides a rotating surface, making it easier to evenly frost and decorate your cupcakes.
Mastering Different Frosting Types
American Buttercream
The most common and easiest frosting to make. It’s sweet, fluffy, and holds its shape well.
Swiss Meringue Buttercream
A smoother, less sweet alternative to American buttercream. It’s known for its silky texture and stability.
Cream Cheese Frosting
Tangy and delicious, perfect for red velvet cupcakes and carrot cake. It’s less stable than buttercream, so keep it refrigerated.
Chocolate Ganache
Rich and decadent, ganache can be used as a glaze or whipped for a lighter frosting. The ratio of chocolate to cream determines its consistency.
Cupcake Frosting Techniques
The Classic Swirl
- Fill your piping bag with your chosen frosting and a star tip.
- Hold the bag perpendicular to the cupcake, with the tip slightly above the surface.
- Start piping in the center, working your way outwards in a circular motion.
- Continue piping inwards, creating a tall, elegant swirl.
- Release pressure and pull the tip away cleanly.
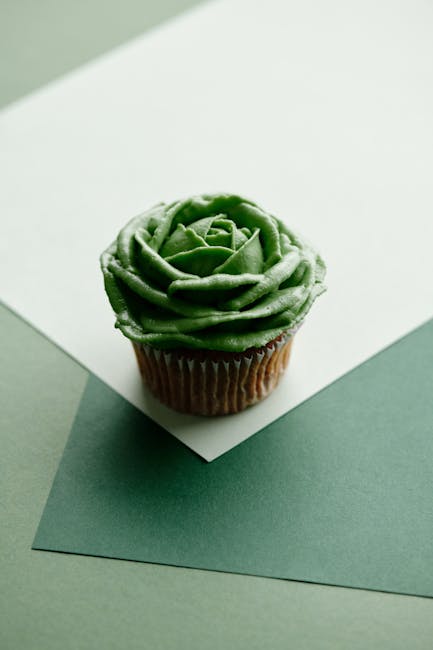
The Rosette
- Use a petal tip in your piping bag.
- Hold the bag perpendicular to the cupcake, with the wider end of the tip facing down.
- Start in the center and pipe a tight swirl outwards, slightly overlapping each layer.
- Continue until you reach the edge of the cupcake.
- Release pressure and pull the tip away.
The Flat Frosting
- Use an offset spatula to spread a generous amount of frosting on the cupcake.
- Smooth the frosting with the spatula, working from the center outwards.
- For a rustic look, leave some texture. For a polished look, smooth it completely.
- You can add sprinkles or other decorations on top.
The Drop Flower
- Use a drop flower tip in your piping bag.
- Hold the piping bag straight above the cupcake.
- Squeeze the piping bag until the icing makes a small flower.
- Stop squeezing, then lift the bag straight up.
- Repeat the process until the top of the cupcake is covered.
Conclusion
Mastering these cupcake frosting techniques takes practice, but the results are well worth the effort! Don’t be afraid to experiment with different frosting types, piping tips, and decorations to create your own unique cupcake masterpieces. With a little patience and creativity, you’ll be frosting like a pro in no time. Happy baking!