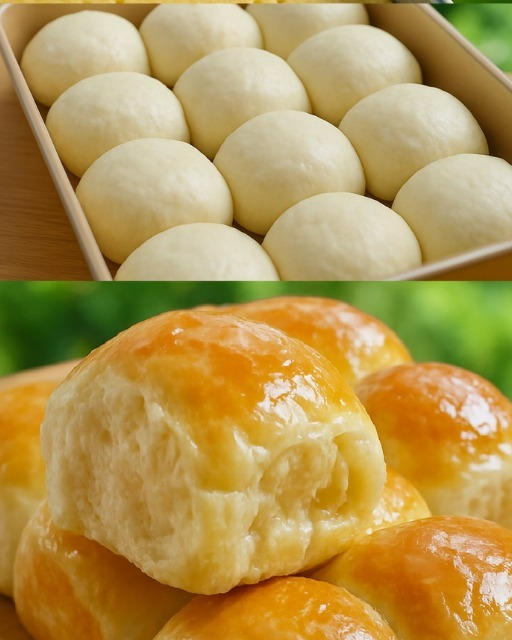
The No-Knead Revelation: Fresh Bread Made Easy!
Picture this: the aroma of freshly baked bread filling your home, the crust crackling as you slice into a warm loaf. Sounds amazing, right? But what if I told you it could be achieved without the tiring process of kneading? Yes, you read that correctly! We’re diving into the world of no-knead bread – a simple, satisfying, and surprisingly delicious way to bake bread at home, even for beginners. Get ready to ditch the dough hook and embrace effortless baking!

Unlocking the Secrets of No-Knead Bread
So, how does this magical no-knead bread actually work? The secret lies in time and hydration. A longer fermentation period allows the gluten in the flour to develop naturally, without the need for vigorous kneading. The higher hydration level (more water) also contributes to a softer, more elastic dough. This results in a bread that’s crusty on the outside and chewy on the inside, all with minimal effort.
The Science Behind the Simplicity
Unlike traditional bread recipes that rely on kneading to develop gluten, no-knead bread uses time and a high water content to achieve the same result. Gluten, a protein found in wheat flour, provides structure and elasticity to the dough. Kneading aligns the gluten strands, creating a network that traps air and gives bread its characteristic texture. In no-knead bread, the long fermentation period allows the gluten to hydrate fully and naturally align, resulting in a similar structure without the manual labor.

Essential Ingredients and Equipment
The beauty of no-knead bread is its simplicity – you likely already have the necessary ingredients in your pantry!
- Flour: All-purpose or bread flour works well. Bread flour has a higher protein content, which can result in a slightly chewier texture.
- Water: Use lukewarm water to activate the yeast.
- Yeast: Instant or active dry yeast can be used. If using active dry yeast, you’ll need to proof it in warm water before adding it to the flour.
- Salt: Don’t skip the salt! It’s essential for flavor and helps control the yeast activity.
As for equipment, you’ll need:
- A large bowl
- A Dutch oven or a heavy pot with a lid (essential for creating that signature crust)
- Parchment paper (optional, but recommended for easy removal)

Step-by-Step Guide to Baking No-Knead Bread
Ready to bake your own no-knead masterpiece? Follow these simple steps:
- Combine the ingredients: In a large bowl, combine the flour, water, yeast, and salt. Mix until just combined – the dough will be shaggy and sticky.
- First Fermentation: Cover the bowl with plastic wrap or a damp towel and let it rest at room temperature for 12-18 hours (or even longer, up to 24 hours, for a tangier flavor).
- Shape the dough: Gently turn the dough out onto a lightly floured surface. Shape it into a round.
- Second Fermentation: Place the dough on a piece of parchment paper and transfer it to a bowl. Cover and let rise for another 30-60 minutes.
- Bake: Preheat your oven to 450°F (232°C) with the Dutch oven inside. Carefully remove the hot Dutch oven and place the parchment paper with the dough inside. Cover and bake for 30 minutes.
- Uncover and bake: Remove the lid and bake for another 15-20 minutes, or until the crust is golden brown and the internal temperature reaches 200-210°F (93-99°C).
- Cool: Let the bread cool completely on a wire rack before slicing and enjoying.

Tips and Tricks for Perfect No-Knead Bread
Want to take your no-knead bread game to the next level? Here are a few tips and tricks:
- Experiment with different flours: Try using whole wheat flour for a nuttier flavor and denser texture.
- Add inclusions: Get creative with your bread by adding herbs, cheese, olives, or dried fruit to the dough.
- Adjust the hydration: If your dough is too sticky to handle, add a little more flour. If it’s too dry, add a little more water.
- Use a Dutch oven: A Dutch oven creates a steamy environment that helps the bread rise and develop a crispy crust. If you don’t have a Dutch oven, you can try baking the bread on a baking stone with a tray of water in the bottom of the oven.
- Scoring the dough: Before baking, score the top of the dough with a sharp knife or lame. This helps control the expansion of the dough and prevents it from cracking unevenly. King Arthur Baking has great resources on this!

Enjoying Your Homemade No-Knead Bread
Now that you’ve baked your own no-knead bread, it’s time to enjoy the fruits of your (minimal) labor! This bread is delicious on its own, but it’s also perfect for sandwiches, toast, or dipping in olive oil. It pairs well with soups, salads, and cheese boards. The possibilities are endless!

Conclusion: Embrace the Ease of No-Knead Baking
No-knead bread is a game-changer for home bakers of all skill levels. Its simplicity and delicious results make it a truly satisfying baking experience. So, ditch the kneading machine and embrace the ease of no-knead baking. You’ll be amazed at how simple it is to create a crusty, flavorful loaf of bread that will impress your friends and family. Happy baking!
Consider trying another recipe! Check out our guide to sourdough starter maintenance to expand your bread-making horizons!

