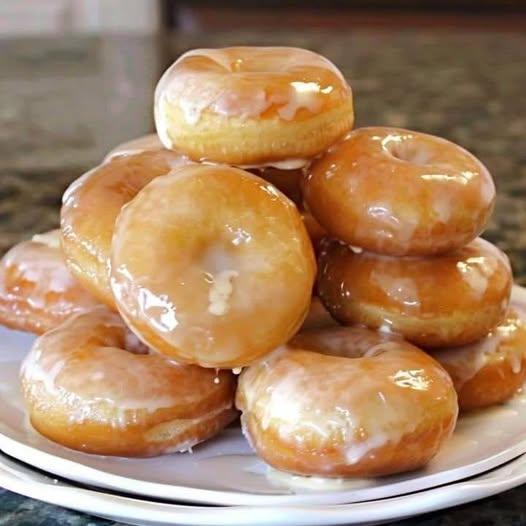
Ever dream of biting into a warm, pillowy doughnut, dripping with sweet, sugary glaze? You don’t need to head to your local bakery! Making classic glazed doughnuts at home is easier than you think, and the results are incredibly rewarding. Get ready to impress your friends and family with your newfound doughnut-making skills!
The Joy of Homemade Glazed Doughnuts
[
There’s something truly special about homemade doughnuts. The aroma filling your kitchen, the satisfaction of creating something delicious from scratch, and of course, the unforgettable taste. We’re going to walk you through everything you need to know to create melt-in-your-mouth glazed doughnuts in your own kitchen. This isn’t just a recipe; it’s an experience!
Mastering the Dough: The Foundation of Deliciousness
[
The key to a great glazed doughnut lies in the dough. A light, airy, and slightly sweet dough is the perfect canvas for a sugary glaze.
Ingredients You’ll Need for the Dough
[
- All-purpose flour (high-quality is recommended)
- Granulated sugar
- Active dry yeast (or instant yeast)
- Warm milk (temperature is important!)
- Large eggs
- Unsalted butter (melted and cooled)
- Salt
- Vanilla extract (optional, but adds a lovely flavor)
Step-by-Step Dough Preparation
[
- Activate the Yeast: In a small bowl, combine warm milk (around 110°F) and sugar. Sprinkle the yeast over the mixture and let it sit for 5-10 minutes until foamy. This confirms the yeast is alive and ready to work its magic.
- Combine Wet and Dry Ingredients: In a large mixing bowl (or the bowl of a stand mixer), whisk together the flour and salt. Add the yeast mixture, eggs, melted butter, and vanilla extract (if using).
- Knead the Dough: Knead the dough for 5-7 minutes using a stand mixer with a dough hook, or 8-10 minutes by hand on a lightly floured surface. The dough should be smooth, elastic, and slightly sticky.
- First Proof: Place the dough in a greased bowl, turning to coat. Cover with plastic wrap and let it rise in a warm place for 1-1.5 hours, or until doubled in size. This allows the yeast to create air pockets, resulting in a light and airy doughnut.
Tips for Perfect Dough Proofing
[
- Ensure your proofing area is warm but not too hot. An oven turned off with the light on is a great option.
- Don’t rush the proofing process! Allowing the dough to fully rise is crucial for texture.
- If your kitchen is cold, you can place a bowl of hot water near the dough to create a warmer environment.
Shaping and Frying Your Doughnuts
[
Now for the fun part! Shaping and frying your doughnuts brings them to life.
Rolling and Cutting the Doughnuts
[
- Gently punch down the risen dough to release any air.
- Turn the dough out onto a lightly floured surface.
- Roll the dough to about ½ inch thickness.
- Use a doughnut cutter (or two different sized round cutters) to cut out doughnut shapes.
- Place the cut doughnuts on a parchment-lined baking sheet.
Second Proofing: A Crucial Step
[
- Cover the cut doughnuts with a clean kitchen towel and let them rise for another 30-45 minutes. This second proof allows them to become even lighter and airier.
- They should almost double in size again.
Frying for Golden Perfection
[
- Heat vegetable oil (or canola oil) in a large, heavy-bottomed pot to 350°F (175°C). Use a thermometer to monitor the temperature.
- Carefully lower the doughnuts into the hot oil, a few at a time, being careful not to overcrowd the pot.
- Fry for 1-2 minutes per side, until golden brown.
- Remove the doughnuts with a slotted spoon and place them on a wire rack lined with paper towels to drain excess oil.
Frying Tips for Best Results
- Maintain a consistent oil temperature for even cooking.
- Don’t overcrowd the pot, as this will lower the oil temperature and result in greasy doughnuts.
- Use a thermometer to accurately gauge the oil temperature.
The Glaze: The Sweet Finishing Touch
[
No glazed doughnut is complete without, well, the glaze! This simple glaze is the perfect complement to the rich, yeasty dough.
Simple Glaze Ingredients
[
- Powdered sugar
- Milk (or water)
- Vanilla extract (optional)
Making the Perfect Glaze
[
- In a medium bowl, whisk together the powdered sugar and milk (or water) until smooth.
- Add vanilla extract (if using) and whisk again.
- The glaze should be thick enough to coat the doughnuts, but thin enough to drip slightly. If it’s too thick, add a little more milk (or water). If it’s too thin, add a little more powdered sugar.
Glazing Your Doughnuts
[
- While the doughnuts are still warm (but not too hot), dip them into the glaze, coating them completely.
- Place the glazed doughnuts back on the wire rack to allow the excess glaze to drip off.
- Let the glaze set for a few minutes before enjoying.
Enjoying Your Homemade Glazed Doughnuts
[
Congratulations! You’ve successfully made classic glazed doughnuts at home. Now it’s time to savor the fruits of your labor.
Serving and Storage Tips
- Enjoy your doughnuts warm, as they are best enjoyed fresh.
- Store leftover doughnuts in an airtight container at room temperature for up to 2 days. They can be reheated briefly in the microwave if desired.
Homemade Doughnut Takeaways
[
Making glazed doughnuts from scratch might seem daunting, but with a little patience and these simple steps, you can create bakery-worthy treats right in your own kitchen. So, gather your ingredients, put on your apron, and get ready to experience the joy of homemade doughnuts. Your taste buds will thank you! Now that you know how to make classic glazed doughnuts, why not try experimenting with different flavors of glaze? The possibilities are endless!