Craving Crispy, Dry Pork Rinds? Here’s the Ultimate Recipe!
Let’s face it, store-bought pork rinds can be a bit of a letdown. Sometimes they’re greasy, sometimes they’re not crispy enough, and sometimes they just don’t have that satisfying crunch. But what if you could make perfectly crispy and dry pork rinds right in your own kitchen? Well, you can! This recipe will guide you through every step, from preparing the pork skin to achieving that irresistible, airy texture.
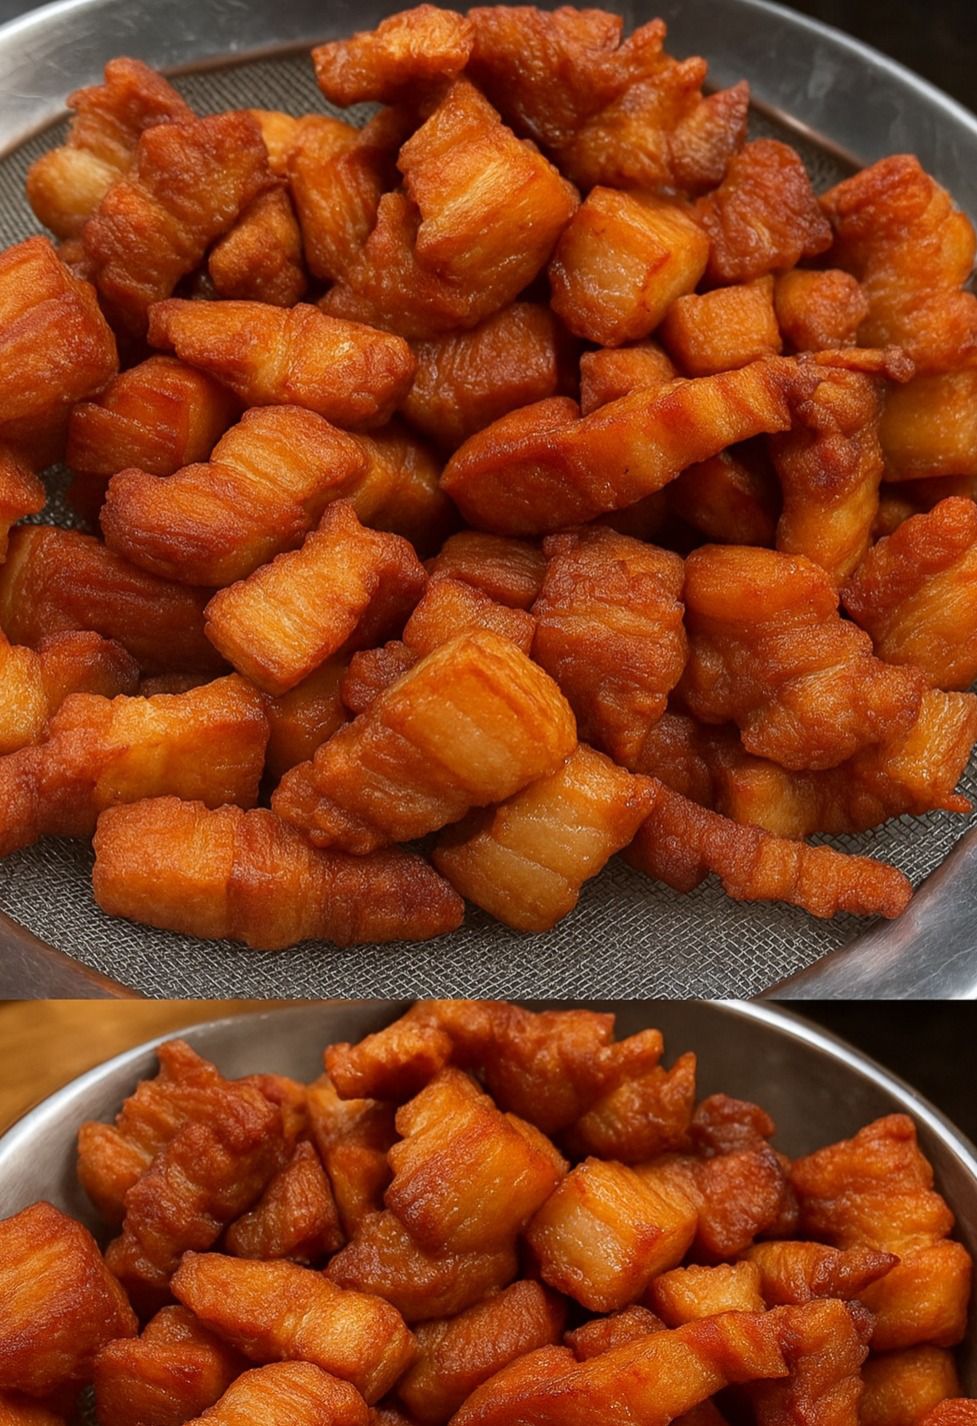
 A close-up shot of perfectly crispy and dry homemade pork rinds.
Making the Magic Happen: Your Pork Rinds Journey
Creating amazing pork rinds is all about the process. It might seem daunting at first, but with a little patience and attention to detail, you’ll be snacking on homemade chicharrones in no time!
 A collage showcasing the different stages of pork rind preparation, from raw skin to finished product.
Sourcing and Preparing the Pork Skin
The first crucial step is obtaining high-quality pork skin. Look for skin that’s relatively thick and free of excessive fat. You can often find it at your local butcher shop or even some grocery stores. Don’t be afraid to ask your butcher for recommendations!
Important tip: If the skin is frozen, thaw it completely in the refrigerator before proceeding. This ensures even cooking.
 A photo of fresh pork skin being prepared for cooking, potentially showing trimming or scoring.
Cleaning and Scoring the Skin
Once you have your pork skin, rinse it thoroughly under cold water. Then, lay it flat on a cutting board and use a sharp knife to score the skin in a crosshatch pattern. This helps the fat render evenly and prevents the rinds from curling up too much during frying.
- Make the cuts about 1 inch apart.
- Don’t cut all the way through the skin – just score the surface.
- This step is crucial for achieving that signature crispy texture.
 A close-up shot demonstrating the scoring process on the pork skin.
The Drying Process: The Secret to Crispiness
Now comes the most important step: drying the pork skin. This is what separates soggy rinds from the truly crispy and dry ones. There are two main methods for drying:
- Oven Drying: Preheat your oven to the lowest possible temperature (usually around 170-200°F). Place the scored pork skin on a wire rack set over a baking sheet. This allows air to circulate and dry the skin evenly. Dry for 3-4 hours, or until the skin is leathery and slightly translucent.
- Air Drying: If you have the time and the right climate (low humidity), you can also air dry the skin. Place it on a wire rack in a well-ventilated area for 24-48 hours. This method takes longer, but some argue it results in even crispier rinds.
A photo of pork skin drying in an oven or being air-dried on a rack.
Frying to Perfection: Achieving the Ultimate Crunch
Once the pork skin is thoroughly dried, it’s time to fry! Use a deep pot or Dutch oven and heat about 2 inches of oil (such as peanut oil, lard, or vegetable oil) to around 350°F (175°C). A deep-fry thermometer is your best friend here!
 A photo of pork rinds frying in hot oil, showcasing bubbling and the transition to a golden-brown color.
Frying in Batches
Carefully add the dried pork skin to the hot oil in batches, being careful not to overcrowd the pot. Overcrowding will lower the oil temperature and result in soggy rinds. Fry for 2-5 minutes per batch, or until the rinds are puffed up, golden brown, and crispy.
Tip: Use a slotted spoon or spider to remove the rinds from the oil and place them on a wire rack lined with paper towels to drain excess oil. Season immediately with salt and any other desired spices (like chili powder, garlic powder, or paprika).
A photo showing the process of removing fried pork rinds from the oil and placing them on a wire rack to drain.
Seasoning and Serving Your Homemade Pork Rinds
While salt is a classic and delicious option, don’t be afraid to get creative with your seasonings! Experiment with different spices, herbs, and even citrus zest to create your own unique flavor combinations.
Some seasoning ideas:
- Salt and pepper
- Chili powder
- Garlic powder
- Onion powder
- Smoked paprika
- Lime zest
Serve your homemade pork rinds immediately for the best crunch! They’re delicious on their own, or as a keto-friendly snack with your favorite dips. Enjoy!
A photo of perfectly seasoned and served homemade pork rinds, possibly with a dipping sauce.
Your Reward: Perfectly Crispy and Dry Pork Rinds!
Making your own crispy and dry pork rinds is a rewarding experience. From sourcing the best skin to mastering the drying and frying techniques, you’ll be creating a snack that’s far superior to anything you can buy in the store. So, grab your pork skin, fire up the fryer, and get ready to enjoy the ultimate crunchy treat!