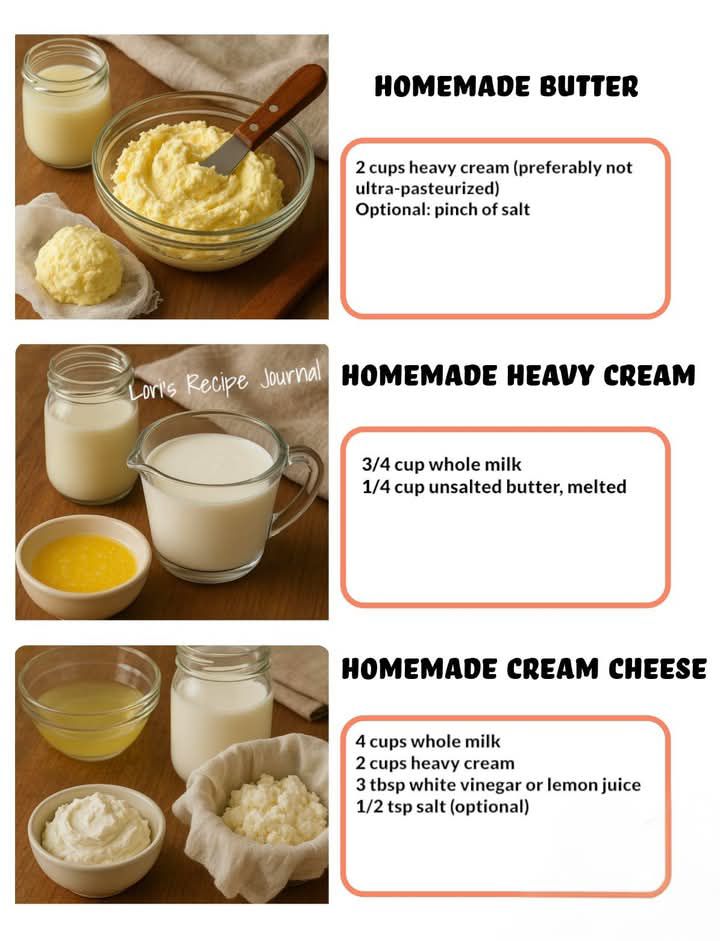
Making delicious dairy products at home is easier than you might think! Forget the store-bought options filled with preservatives and unknown ingredients. With just a few simple tools and some high-quality cream, you can whip up homemade butter, rich heavy cream, and creamy, tangy cream cheese. Let’s dive in and explore how to make these kitchen staples from scratch!
Introduction

 Have you ever dreamed of serving your family the freshest, most flavorful butter, heavy cream, and cream cheese? The taste of homemade is truly unparalleled, and the process is surprisingly straightforward. Plus, you’ll have the satisfaction of knowing exactly what went into your food. In this guide, we’ll walk you through the simple steps to create these delectable dairy delights in your own kitchen. From the creamy richness of homemade butter to the delicate tang of fresh cream cheese, get ready to elevate your culinary creations!
Making Homemade Butter

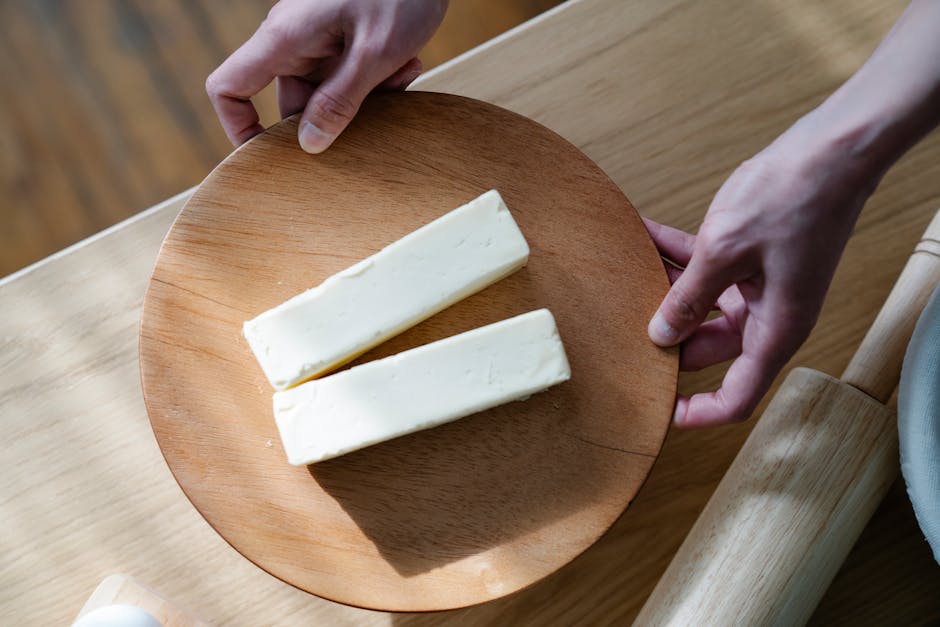 Homemade butter is a revelation! The flavor is richer and more complex than anything you can buy in the store. All you need is heavy cream and a little patience.
What you’ll need:
* High-quality heavy cream (pasteurized, but not ultra-pasteurized, works best)
* A stand mixer, food processor, or even a jar (for shaking!)
* A clean bowl
* Cheesecloth
* Optional: Salt, herbs, or other flavorings
The Process:
1. **Churning the Cream:** Pour the heavy cream into your chosen device. If using a stand mixer, use the whisk attachment and start on medium speed. If using a food processor, pulse it initially and then run it continuously. If you’re going old-school and using a jar, get ready for a workout! Shake vigorously.
2. **The Separation:** Keep churning (or shaking) until the cream separates into butter and buttermilk. This will take time, so be patient. You’ll first see whipped cream, then it will suddenly break and the butter solids will clump together.
3. **Rinsing the Butter:** Drain off the buttermilk (save it for baking – it’s amazing!). Then, rinse the butter under cold water, kneading it with your hands to remove any remaining buttermilk. This is crucial for preventing spoilage.
4. **Salting (Optional):** If you want salted butter, add salt to taste while kneading. You can also add herbs, spices, or even honey for flavored butter.
5. **Storing Your Butter:** Shape the butter into a log or other desired form and wrap it tightly in plastic wrap or parchment paper. Store it in the refrigerator for up to two weeks, or in the freezer for longer storage.
Tips for Perfect Homemade Butter:
* Use the freshest, highest-quality heavy cream you can find.
* Make sure your equipment is clean to prevent contamination.
* Rinsing the butter thoroughly is essential for extending its shelf life.
* Experiment with different flavorings to create your signature butter.
Understanding and Making Heavy Cream

 While you can’t *make* heavy cream from scratch in the same way you make butter or cream cheese (it’s a natural component of milk), it’s important to understand what heavy cream is and how to ensure you’re buying the best quality for your recipes.
What is Heavy Cream?
Heavy cream, also known as whipping cream, is the high-fat layer skimmed from the top of fresh milk. It typically contains at least 36% milkfat. This high fat content is what allows it to be whipped into stable peaks, making it ideal for desserts, sauces, and other culinary applications.
Choosing the Right Heavy Cream:
* **Fat Content:** Look for heavy cream with a fat content of 36% or higher. This will ensure it whips properly and has a rich flavor.
* **Pasteurization:** Pasteurized heavy cream is fine, but avoid ultra-pasteurized (UHT) cream if possible, as it may not whip as well.
* **Ingredients:** Ideally, the ingredient list should only contain cream. Avoid creams with added thickeners or stabilizers, as these can affect the flavor and texture.
Using Heavy Cream:
* **Whipped Cream:** For the best whipped cream, chill your bowl and beaters before whipping the cream. Add sugar or other flavorings towards the end of the whipping process.
* **Cooking:** Heavy cream adds richness and body to sauces, soups, and stews. Be careful not to boil it, as it can curdle.
* **Coffee:** A splash of heavy cream adds a luxurious touch to your morning coffee.
Crafting Homemade Cream Cheese

 Homemade cream cheese has a delightful tang and a wonderfully soft texture. It’s perfect for spreading on bagels, making dips, or using in your favorite cheesecakes.
What you’ll need:
* 1 quart (4 cups) heavy cream
* 1/4 cup buttermilk
* 1/4 teaspoon salt
* Cheesecloth
* A colander
* A bowl
The Process:
1. **Combining the Ingredients:** In a saucepan, combine the heavy cream, buttermilk, and salt. Heat over low heat, stirring occasionally, until the mixture reaches 190°F (88°C). This will take about 30-45 minutes. Do *not* boil.
2. **Curdling the Mixture:** Remove the saucepan from the heat and let it cool slightly, about 15 minutes. The mixture should start to thicken and curdle.
3. **Draining the Curds:** Line a colander with several layers of cheesecloth. Place the colander over a bowl. Pour the cream cheese mixture into the cheesecloth-lined colander.
4. **Draining Time:** Let the mixture drain for at least 12 hours, or up to 24 hours, in the refrigerator. The longer it drains, the thicker the cream cheese will be.
5. **Enjoying Your Cream Cheese:** Once the cream cheese has reached your desired consistency, transfer it to an airtight container and store it in the refrigerator for up to a week.
Tips for Perfect Homemade Cream Cheese:
* Use a reliable thermometer to monitor the temperature of the cream.
* Be patient! The draining process is crucial for achieving the right texture.
* Experiment with different flavors by adding herbs, spices, or honey after the cream cheese has drained.
* If the cream cheese is too dry, add a tablespoon or two of heavy cream or milk to reach your desired consistency.
Conclusion

Making homemade butter, understanding heavy cream, and crafting your own cream cheese is a rewarding experience. Not only will you enjoy the superior taste and quality of these homemade staples, but you’ll also gain a greater appreciation for the simple ingredients that go into them. So, ditch the store-bought versions and embrace the delicious world of homemade dairy! The results are well worth the effort, and your taste buds will thank you. Now go forth and create!