Indulge in the Art of Homemade Chocolate Eclairs
Ever dream of biting into a perfectly crafted chocolate eclair, the pastry yielding with a delightful puff, the creamy filling bursting with flavor, and the rich chocolate glaze completing the symphony? You don’t need to be a professional baker to achieve this culinary masterpiece! This guide will walk you through a detailed chocolate eclairs recipe, transforming your kitchen into a patisserie. Get ready to impress yourself and your loved ones!
(
Mastering the Choux Pastry: The Foundation of Your Eclairs
The heart of a great eclair lies in its choux pastry. This seemingly simple dough can be a little tricky, but fear not! We’ll break it down step-by-step to ensure your success.
Ingredients for Choux Pastry
Here’s what you’ll need to create the perfect choux pastry:
- 1 cup (240ml) water
- 1/2 cup (115g) unsalted butter, cut into pieces
- 1/4 teaspoon salt
- 1 cup (120g) all-purpose flour
- 4 large eggs
(
Step-by-Step Choux Pastry Creation
- Combine Water, Butter, and Salt: In a medium saucepan, combine the water, butter, and salt. Heat over medium heat, stirring occasionally, until the butter is melted and the mixture comes to a rolling boil.
- Add Flour: Remove the saucepan from the heat and immediately add all the flour at once. Stir vigorously with a wooden spoon until the mixture forms a smooth ball that pulls away from the sides of the pan.
- Cool the Dough: Return the saucepan to low heat and continue to stir for 1-2 minutes, drying the dough slightly. This step is crucial for preventing soggy eclairs. Transfer the dough to a mixing bowl and let it cool for about 5-10 minutes, or until it’s just warm to the touch.
- Incorporate the Eggs: Add the eggs one at a time, beating well after each addition. The dough will initially look curdled, but keep beating until it becomes smooth and glossy. The final dough should be thick enough to hold its shape but soft enough to pipe.
- Piping the Eclairs: Transfer the choux pastry to a piping bag fitted with a large round tip (about 1/2 inch). Pipe 4-inch long strips onto a baking sheet lined with parchment paper, leaving about 2 inches between each strip.
- Baking to Perfection: Bake in a preheated oven at 400°F (200°C) for 15 minutes, then reduce the temperature to 350°F (175°C) and bake for another 20-25 minutes, or until the eclairs are golden brown and puffed up. Do not open the oven door during baking, as this can cause the eclairs to deflate.
- Cooling is Key: Once baked, turn off the oven and prop the door open slightly with a wooden spoon. Let the eclairs cool in the oven for about 30 minutes before transferring them to a wire rack to cool completely. This helps prevent them from collapsing.
(
Crafting the Creamy Filling
A delicious filling is just as important as the pastry itself. We’ll be making a classic pastry cream, but feel free to experiment with flavors!
Ingredients for Pastry Cream
Gather these ingredients for a luscious pastry cream filling:
- 2 cups (480ml) whole milk
- 1/2 cup (100g) granulated sugar
- 1/4 cup (30g) cornstarch
- Pinch of salt
- 4 large egg yolks
- 2 tablespoons unsalted butter
- 1 teaspoon vanilla extract
(
Making the Pastry Cream
- Infuse the Milk: In a saucepan, heat the milk over medium heat until it’s almost simmering.
- Whisk Dry Ingredients: In a separate bowl, whisk together the sugar, cornstarch, and salt.
- Temper the Egg Yolks: Whisk the egg yolks into the sugar mixture. Slowly pour about 1/2 cup of the hot milk into the egg yolk mixture, whisking constantly to prevent the eggs from curdling. This process is called tempering.
- Combine and Cook: Pour the tempered egg yolk mixture back into the saucepan with the remaining milk. Cook over medium heat, stirring constantly, until the mixture thickens and comes to a boil. Continue to cook for 1 minute, stirring constantly.
- Finish the Cream: Remove the saucepan from the heat and stir in the butter and vanilla extract.
- Cool Completely: Pour the pastry cream into a bowl, cover with plastic wrap, pressing it directly onto the surface to prevent a skin from forming. Refrigerate for at least 2 hours, or until completely chilled.
(
The Final Touch: Chocolate Glaze
A glossy chocolate glaze adds the perfect finishing touch to your eclairs.
Ingredients for Chocolate Glaze
You’ll need just a few simple ingredients:
- 4 ounces (115g) semi-sweet chocolate, chopped
- 1/2 cup (120ml) heavy cream
- 1 tablespoon corn syrup (optional, for extra shine)
(
Creating the Chocolate Glaze
- Melt the Chocolate: In a heatproof bowl set over a simmering pot of water (double boiler), combine the chocolate and heavy cream. Stir until the chocolate is melted and the glaze is smooth. Add corn syrup if using.
- Glaze the Eclairs: Once the eclairs are completely cool and the pastry cream is chilled, use a serrated knife to carefully slice each eclair in half lengthwise. Fill each eclair with the pastry cream. Dip the top half of each eclair into the chocolate glaze and let the excess drip off. Place the glazed eclairs on a wire rack to allow the glaze to set.
(
Assembling and Storing Your Chocolate Eclairs
Now that you’ve mastered all the components, it’s time to put it all together!
Assembling Your Masterpieces
- Carefully slice the cooled eclairs lengthwise.
- Generously fill each eclair with the chilled pastry cream.
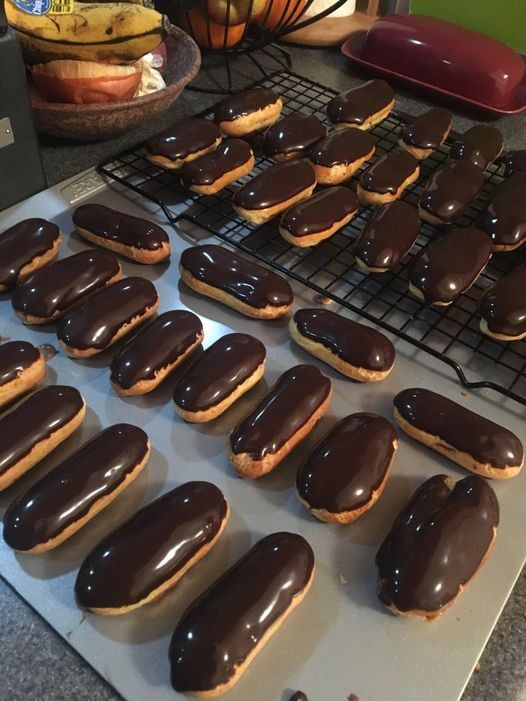
- Dip the top halves in the chocolate glaze, letting the excess drip off.
- Allow the glaze to set before serving.
Storing Your Eclairs
- Chocolate eclairs are best enjoyed fresh.
- If you need to store them, keep them refrigerated in an airtight container for up to 2 days.
- The eclairs may become slightly softer over time, but they’ll still be delicious!
(
Conclusion: Enjoy Your Homemade Chocolate Eclairs!
Congratulations! You’ve successfully created delicious homemade chocolate eclairs. This recipe might seem a little daunting at first, but with patience and practice, you’ll be whipping up these delectable treats like a pro. Share your creations with friends and family, and enjoy the satisfaction of making something truly special. Now, go ahead and indulge – you deserve it! And don’t forget to experiment with different fillings and glazes to create your own signature eclair!