Have you ever thought about making your own cheese at home? It sounds intimidating, right? But what if I told you that with just 1 liter of milk, 1 yogurt, and half a lemon, you could create delicious homemade cheese? It’s easier than you think, and the result is a fresh, creamy delight that’s far superior to anything you can buy at the store. Get ready to impress yourself (and your friends!) with this simple recipe.
The Magic Formula: Milk, Yogurt, and Lemon

This isn’t some complicated cheese-making process involving rennet and aging caves. This is a quick and easy method that yields a beautiful, fresh cheese perfect for spreading on crackers, adding to salads, or simply enjoying on its own. The magic lies in the combination of these three humble ingredients:
- Milk: The foundation of your cheese. Whole milk will give you the richest flavor and creamiest texture, but you can experiment with different types.
- Yogurt: This introduces beneficial bacteria that help coagulate the milk and adds a slight tang to the final product. Plain, unsweetened yogurt is key.
- Lemon: The acid in the lemon juice helps separate the curds from the whey, a crucial step in cheese-making.
Let’s Make Cheese! The Step-by-Step Guide

Here’s a detailed breakdown of how to transform these three simple ingredients into delicious homemade cheese:
Step 1: Heating the Milk
- Pour 1 liter of milk into a saucepan.
- Heat the milk over medium heat, stirring occasionally to prevent it from scorching. You’re aiming for a temperature just below boiling – around 190-200°F (88-93°C). You’ll see small bubbles forming around the edges of the pan.
- Remove the milk from the heat.
Step 2: Adding the Yogurt and Lemon

- Gently stir in 1 yogurt. Make sure the yogurt is plain and unsweetened for the best result.
- Squeeze in the juice of half a lemon. You’ll immediately notice the milk starting to curdle.
- Stir gently for a minute or two to encourage the separation of curds and whey.
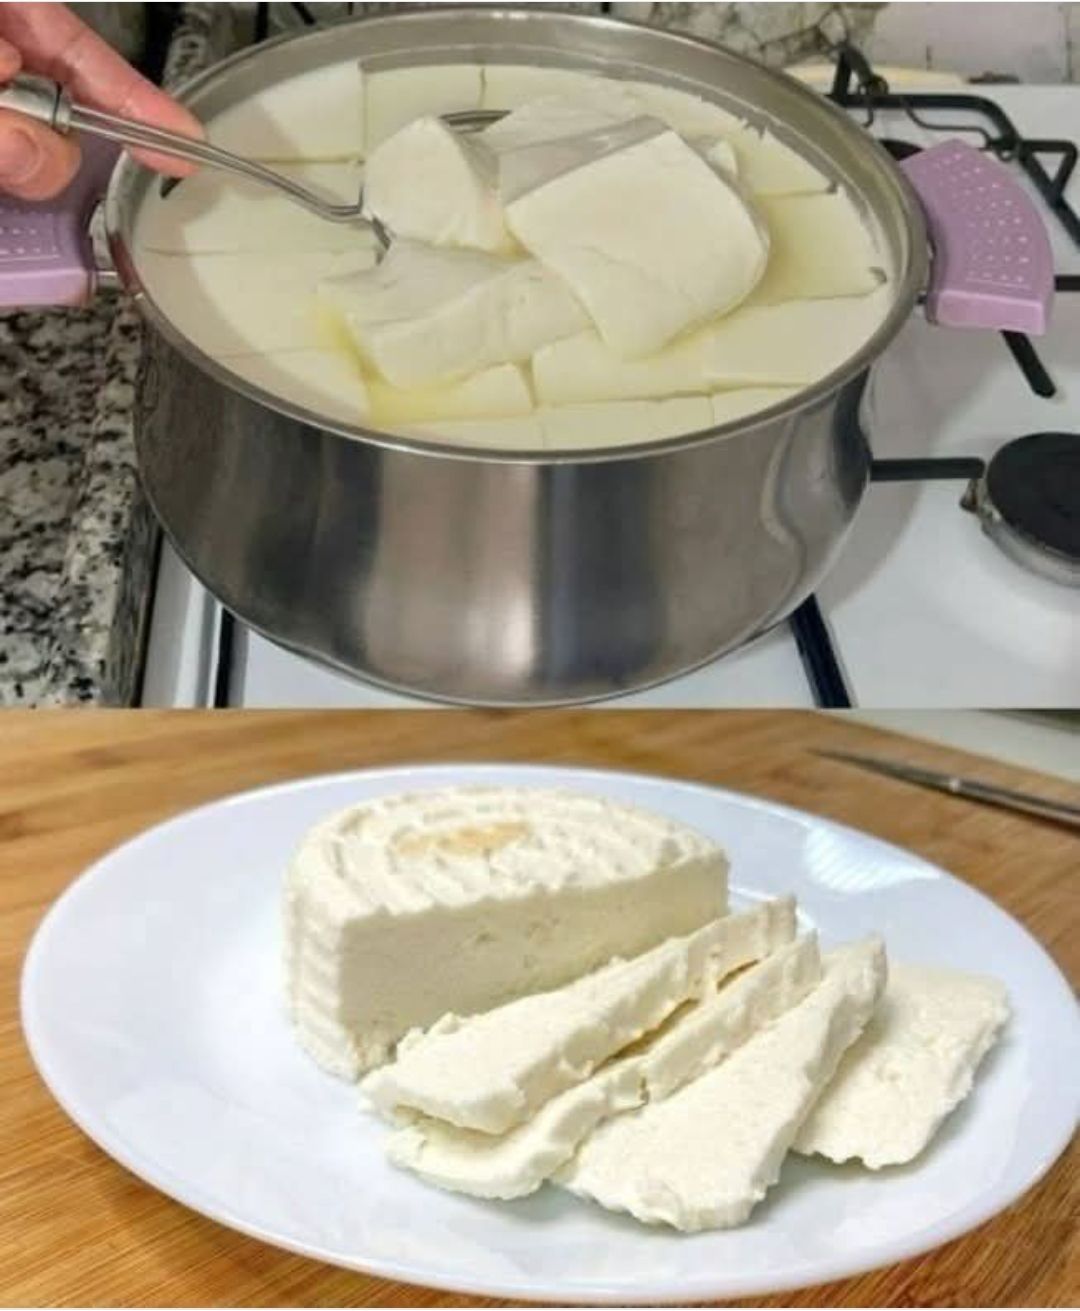
Step 3: Straining the Curds
- Line a colander with cheesecloth. You can find cheesecloth at most grocery stores or online. Alternatively, a clean muslin cloth works well.
- Pour the curdled milk mixture into the cheesecloth-lined colander.
- Gather the edges of the cheesecloth and tie them together to form a small bag.
- Hang the bag over a bowl or place it in the colander so the whey can drain.
- Let it drain for at least 30 minutes for a soft, spreadable cheese. For a firmer cheese, let it drain for several hours or even overnight in the refrigerator.
Step 4: Enjoy Your Homemade Cheese!
Once the whey has drained to your desired consistency, your homemade cheese is ready to enjoy! Transfer it to a bowl or container and store it in the refrigerator for up to a week.
Tips and Variations for Perfect Homemade Cheese

Want to take your homemade cheese to the next level? Here are a few tips and variations to try:
- Salt: Add a pinch of salt to the milk mixture for added flavor.
- Herbs and Spices: Mix in fresh herbs like dill, chives, or parsley after draining the cheese. You can also add spices like garlic powder, onion powder, or paprika.
- Garlic: Roasted garlic cloves, mashed and mixed into the cheese, create a delicious and savory spread.
- Sun-Dried Tomatoes: Finely chopped sun-dried tomatoes add a burst of flavor and color.
- Experiment with Milk: Try using goat milk or sheep milk for a different flavor profile.
Conclusion: Easy Homemade Cheese is Within Reach!
Who knew that making cheese could be so simple? With just 1 liter of milk, 1 yogurt, and half a lemon, you can create a delightful and versatile homemade cheese that will impress your taste buds and your friends. So, ditch the store-bought stuff and give this recipe a try. You’ll be amazed at how easy and rewarding it is to create your own delicious cheese from scratch!