Craving Sunshine on a Plate? Let’s Bake an Orange Upside-Down Cake!
Few desserts are as visually stunning and deliciously satisfying as an orange upside-down cake. The caramelized orange slices, soaked in buttery goodness, sitting atop a moist and tender cake – it’s a guaranteed showstopper and a surprisingly easy recipe to master. Forget the winter blues; let’s bring some sunshine to your kitchen with this delightful treat!
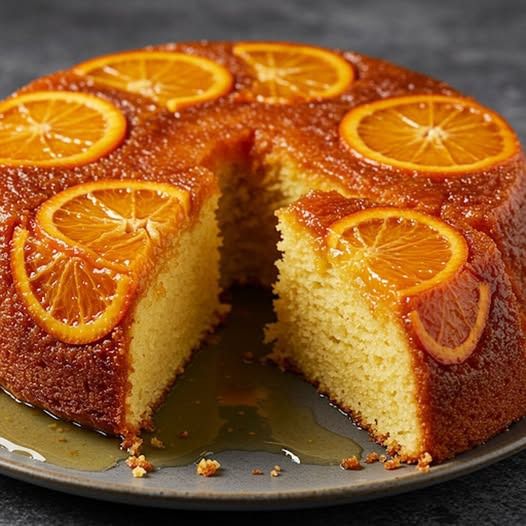
 A close-up, vibrant photo of a freshly baked orange upside-down cake with visible caramelized orange slices.
Unlocking the Secrets to the Perfect Orange Upside-Down Cake
While the idea might seem a little fancy, an orange upside-down cake is incredibly approachable. The key to success lies in understanding a few simple techniques and choosing quality ingredients. Let’s dive into the details and transform you into an upside-down cake pro!
 A step-by-step photo collage showing the key stages of making the cake, from preparing the pan to inverting the finished cake.
Choosing the Right Oranges: Citrus Power!
The star of the show is, of course, the oranges. But not just any orange will do! We want oranges that are juicy, flavorful, and hold their shape during baking. Here’s what to look for:
- Navel Oranges: A classic choice, navel oranges are readily available and offer a good balance of sweetness and acidity.
- Cara Cara Oranges: These are a personal favorite! Their pinkish-red flesh and slightly sweet-tart flavor add a beautiful color and unique taste to the cake.
- Blood Oranges: For a truly dramatic and flavorful cake, blood oranges are your go-to. Their deep red color intensifies during baking, creating a stunning visual effect.
- Avoid: Valencia oranges are too juicy and can make the cake soggy.
 A side-by-side comparison photo of different types of oranges (Navel, Cara Cara, Blood Orange) sliced and ready to be used in the cake.
The Caramel Magic: Building Flavor from the Bottom Up
The caramel layer is crucial for that signature upside-down cake goodness. It’s what transforms the orange slices into sticky, sweet perfection.
Here’s how to get it right:
- Melt the Butter: Gently melt butter in your cake pan over low heat.
- Add the Sugar: Stir in brown sugar (light or dark, depending on your preference) until it’s completely dissolved and the mixture is smooth.
- Arrange the Oranges: Carefully arrange the orange slices in a single layer on top of the caramel. You can overlap them slightly, but avoid overcrowding. Consider adding a glace cherry to the middle of the orange for a traditional and colourful touch!
 A close-up photo showing the caramel being poured into the pan and orange slices being carefully arranged on top.
Crafting the Perfect Cake Batter: Moist and Tender Goodness
The cake batter should be moist and tender, providing a delightful contrast to the caramelized oranges. A simple yellow cake or vanilla cake recipe works beautifully. Here are some tips to ensure success:
- Room Temperature Ingredients: Use room temperature butter, eggs, and milk for a smooth and even batter.
- Don’t Overmix: Overmixing can lead to a tough cake. Mix the batter until just combined.
- A Touch of Citrus: Adding orange zest or a tablespoon of orange juice to the batter enhances the citrus flavor.
 A photo of a perfectly mixed cake batter in a bowl, ready to be poured into the prepared pan.
Baking and Inverting: The Moment of Truth!
The baking process is relatively straightforward. Bake the cake until a toothpick inserted into the center comes out clean.
Inverting the cake is the most nerve-wracking part, but with a little patience, it’s easy to master:
- Cool Slightly: Let the cake cool in the pan for about 10-15 minutes after removing it from the oven. This allows the caramel to settle slightly.
- Loosen the Edges: Run a knife around the edges of the cake to loosen it from the pan.
- Invert Carefully: Place a serving plate over the top of the pan, hold them tightly together, and carefully flip the cake over.
- Release the Pan: Gently tap the pan to release the cake. If it doesn’t release immediately, try gently wiggling the pan or using a spatula to help loosen it.
 A photo showing the process of inverting the cake onto a serving plate, with hands holding the pan and plate securely.
Orange Upside-Down Cake Variations: Get Creative!
Once you’ve mastered the basic recipe, feel free to experiment with variations:
- Pineapple Upside-Down Cake: The classic! Swap the oranges for pineapple slices.
- Cranberry Upside-Down Cake: Perfect for the holidays! Use fresh or frozen cranberries for a tart and festive twist.
- Apple Upside-Down Cake: A cozy and comforting variation. Use sliced apples and a touch of cinnamon.
A collage of different upside-down cake variations (pineapple, cranberry, apple).
Enjoy Your Slice of Sunshine!
And there you have it! A beautiful and delicious orange upside-down cake, ready to brighten up any occasion. This recipe is a testament to how simple ingredients and careful techniques can create something truly special. So, grab your oranges, preheat your oven, and get ready to enjoy a slice of sunshine!
A lifestyle photo of someone enjoying a slice of orange upside-down cake with a cup of coffee or tea in a cozy setting.