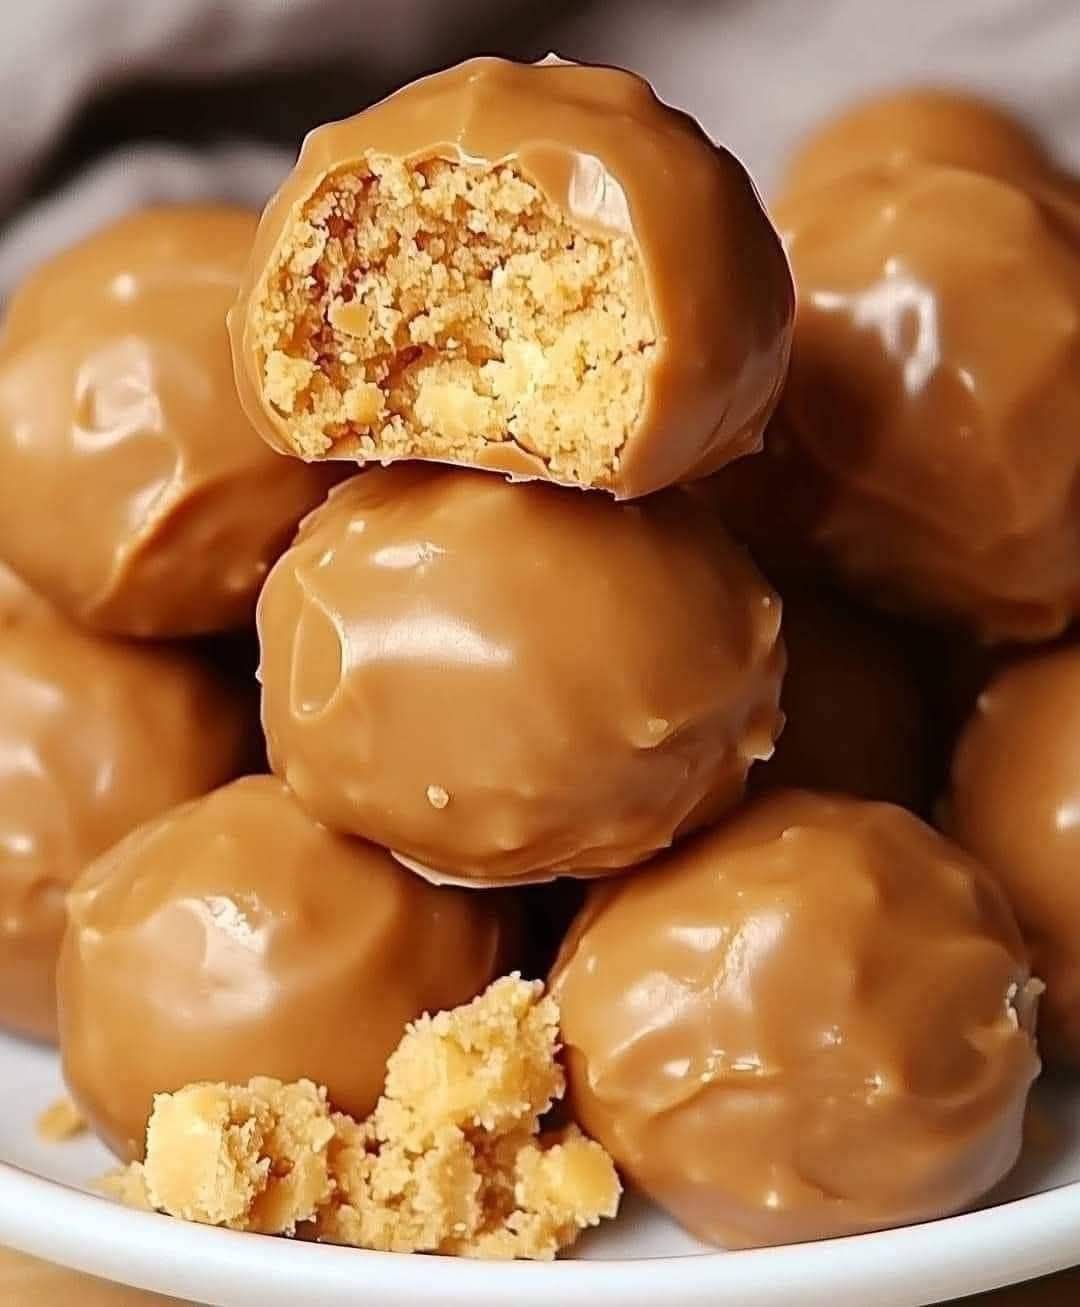
Craving a Butterfinger? Try These Homemade Butterfinger Balls!
Ever wished you could enjoy the irresistible taste of a Butterfinger without all the processed ingredients? Well, you’re in luck! These homemade Butterfinger balls are a delicious and surprisingly easy treat to make. They perfectly capture that peanut buttery, crispy, and slightly salty flavor we all know and love. Get ready to impress your friends and family with this fun and addictive recipe!
Making Your Own Butterfinger Magic
What You’ll Need: The Ingredient Rundown
Let’s gather the ingredients! Don’t worry, you probably have most of these pantry staples already.
- Peanut Butter: Creamy is best for a smooth texture, but crunchy can add a nice bit of extra texture. Aim for a natural peanut butter, if possible.
- Powdered Sugar: This is key for that sweet, crumbly Butterfinger texture.
- Corn Flakes: These provide the signature crispy crunch. You’ll need to crush them up!
- Chocolate Chips: For coating! Milk chocolate, semi-sweet, or even dark chocolate work well depending on your preference.
- Coconut Oil (optional): A little bit added to the melted chocolate helps create a smooth and glossy coating.

Step-by-Step: Bringing it All Together
Now for the fun part – making the Butterfinger balls! Here’s a simple guide to follow:
- Crush the Corn Flakes: Place the corn flakes in a resealable bag and crush them into small pieces using a rolling pin or your hands. You want them to be finely crushed, but still retain some texture.
- Mix the Base: In a large bowl, combine the peanut butter, powdered sugar, and crushed corn flakes. Mix well until a dough forms.
- Roll into Balls: Roll the mixture into small, bite-sized balls. Aim for about 1-inch in diameter.
- Chill: Place the balls on a baking sheet lined with parchment paper and chill in the refrigerator for at least 30 minutes. This will help them firm up and make them easier to dip.
- Melt the Chocolate: While the balls are chilling, melt the chocolate chips in a microwave-safe bowl or using a double boiler. If using coconut oil, add it to the chocolate and stir until melted and smooth.
- Dip and Decorate: Dip each chilled ball into the melted chocolate, ensuring it’s fully coated. Place the dipped balls back on the parchment paper. You can add sprinkles or a drizzle of extra melted chocolate for decoration.
- Set and Enjoy: Return the baking sheet to the refrigerator and let the chocolate set completely. Once the chocolate is firm, your homemade Butterfinger balls are ready to enjoy!

Tips and Tricks for Butterfinger Ball Perfection
Want to elevate your homemade Butterfinger ball game? Here are a few extra tips:
- Don’t Overmix: Overmixing the peanut butter mixture can make the balls tough. Mix until just combined.
- Adjust Sweetness: If you prefer a less sweet treat, reduce the amount of powdered sugar.
- Add a Pinch of Salt: A pinch of salt to the peanut butter mixture can enhance the flavor and balance the sweetness.
- Get Creative with Coatings: Instead of plain chocolate, try adding chopped nuts, crushed pretzels, or even toffee bits to the chocolate coating.
- Storage: Store your homemade Butterfinger balls in an airtight container in the refrigerator for up to a week.

Your Butterfinger Adventure Awaits
Homemade Butterfinger balls are a fun and rewarding treat to make. They are perfect for parties, holiday gatherings, or just a sweet indulgence on a cozy night in. With simple ingredients and easy-to-follow instructions, you can whip up a batch in no time. So, grab your ingredients and get ready to enjoy the irresistible flavor of Butterfinger, made with love (and without the questionable additives!). Happy baking!